Making handmade candles is a creative and enjoyable craft that allows you to customize candles for your own use or to give as gifts. Here’s a basic guide on how to make handmade candles:
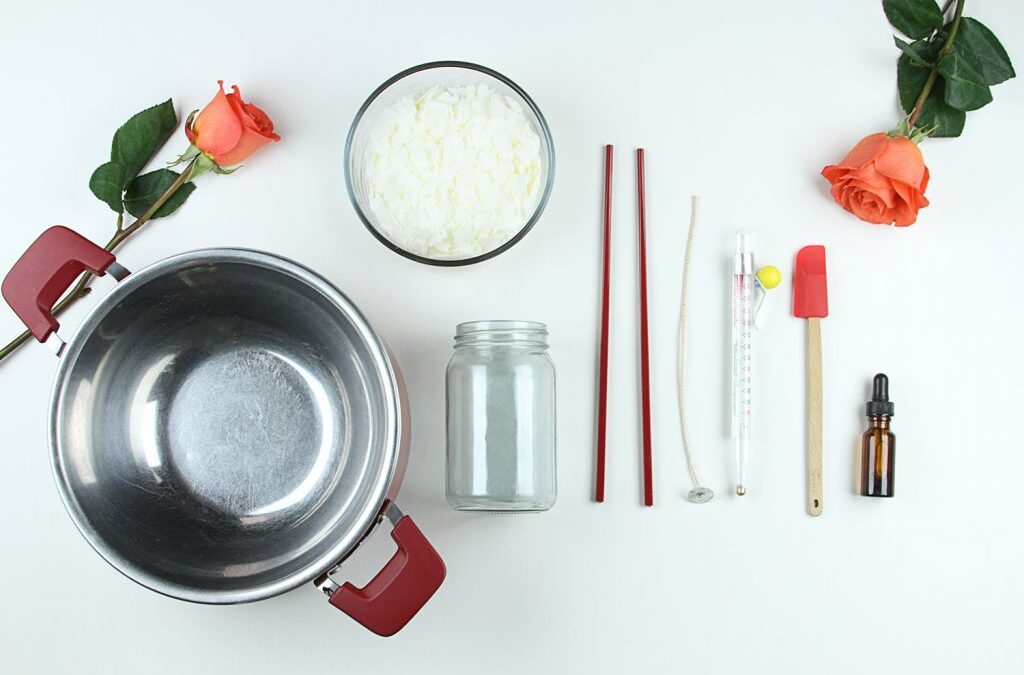
Materials You’ll Need:
- Wax: You can use different types of wax, such as paraffin wax, soy wax, or beeswax. Each has its own characteristics and melting points.
- Candle Wick: Choose a wick appropriate for the type of wax you’re using. Wick size and material can vary depending on the candle’s size and purpose.
- Candle Fragrance (optional): If you want scented candles, you can add candle fragrance oil.
- Candle Dye (optional): To color your candles, you’ll need candle dye or crayon shavings.
- Double Boiler or Microwave: You’ll need a way to melt the wax. A double boiler is preferred, but you can also use a microwave-safe container.
- Thermometer: A candle thermometer helps you monitor the wax temperature.
- Container or Molds: Decide whether you want to make container candles (using jars or containers) or molded candles (using candle molds).
- Stirring Tools: Use a heat-resistant spoon or stirring rod to mix the wax and additives.
- Wick Holder or Chopsticks: These will keep the wick centered while the wax cools.
Steps to Make Handmade Candles:
- Prepare Your Workspace: Set up your workspace with all the necessary materials and ensure good ventilation. Cover the area with newspaper or a disposable tablecloth to catch any spills.
- Measure the Wax: Determine the amount of wax you need based on the size of your candle container or mold. Overfill slightly to account for any waste.
- Melt the Wax: If you’re using a double boiler, place the wax in the top pot and heat it slowly over low to medium heat. If you’re using a microwave, place the wax in a microwave-safe container and heat in short bursts, stirring in between until fully melted. Use a thermometer to monitor the temperature (typically around 170-180°F or 77-82°C).
- Add Fragrance and Color (Optional): If you want scented or colored candles, add fragrance oil or candle dye to the melted wax. Be cautious not to overdo it; a little goes a long way.
- Prepare the Container or Mold: Attach the wick to the bottom center of the container or mold using a small amount of melted wax. Secure the wick in place with a wick holder or chopsticks.
- Pour the Wax: Carefully pour the melted wax into the container or mold, leaving a small gap at the top. Make sure the wick stays centered.
- Cool and Set: Allow the candle to cool and set. This can take several hours, depending on the size of the candle. Do not move or disturb the candle during this time.
- Trim the Wick: Once the candle has fully cooled and hardened, trim the wick to the desired length, leaving about 1/4 inch (6mm) above the candle surface.
- Enjoy Your Handmade Candle: Your handmade candle is now ready to use or give as a gift. Light it and enjoy the warm, cozy ambiance it creates.
Remember to exercise caution when working with hot wax, and follow safety guidelines to avoid accidents. Experiment with different waxes, scents, colors, and container styles to create unique handmade candles tailored to your preferences.
You can buy handmade candles from Kingdom Kreations and Handmade Fever websites online.